Documentation / Set up your NuePrism workspace
Set up your NuePrism workspace
Create a team, attach its Jira Space, add team members, review the setup, and prepare the first workspace.
NuePrism onboarding is completed in four steps: Team → Space → Members → Review. The screenshots below match the current onboarding flow.
Step 1 — Create a Team
Create the team that NuePrism will use as the execution context for this workspace.
1Enter a recognizable Team Name.
2Select Continue.
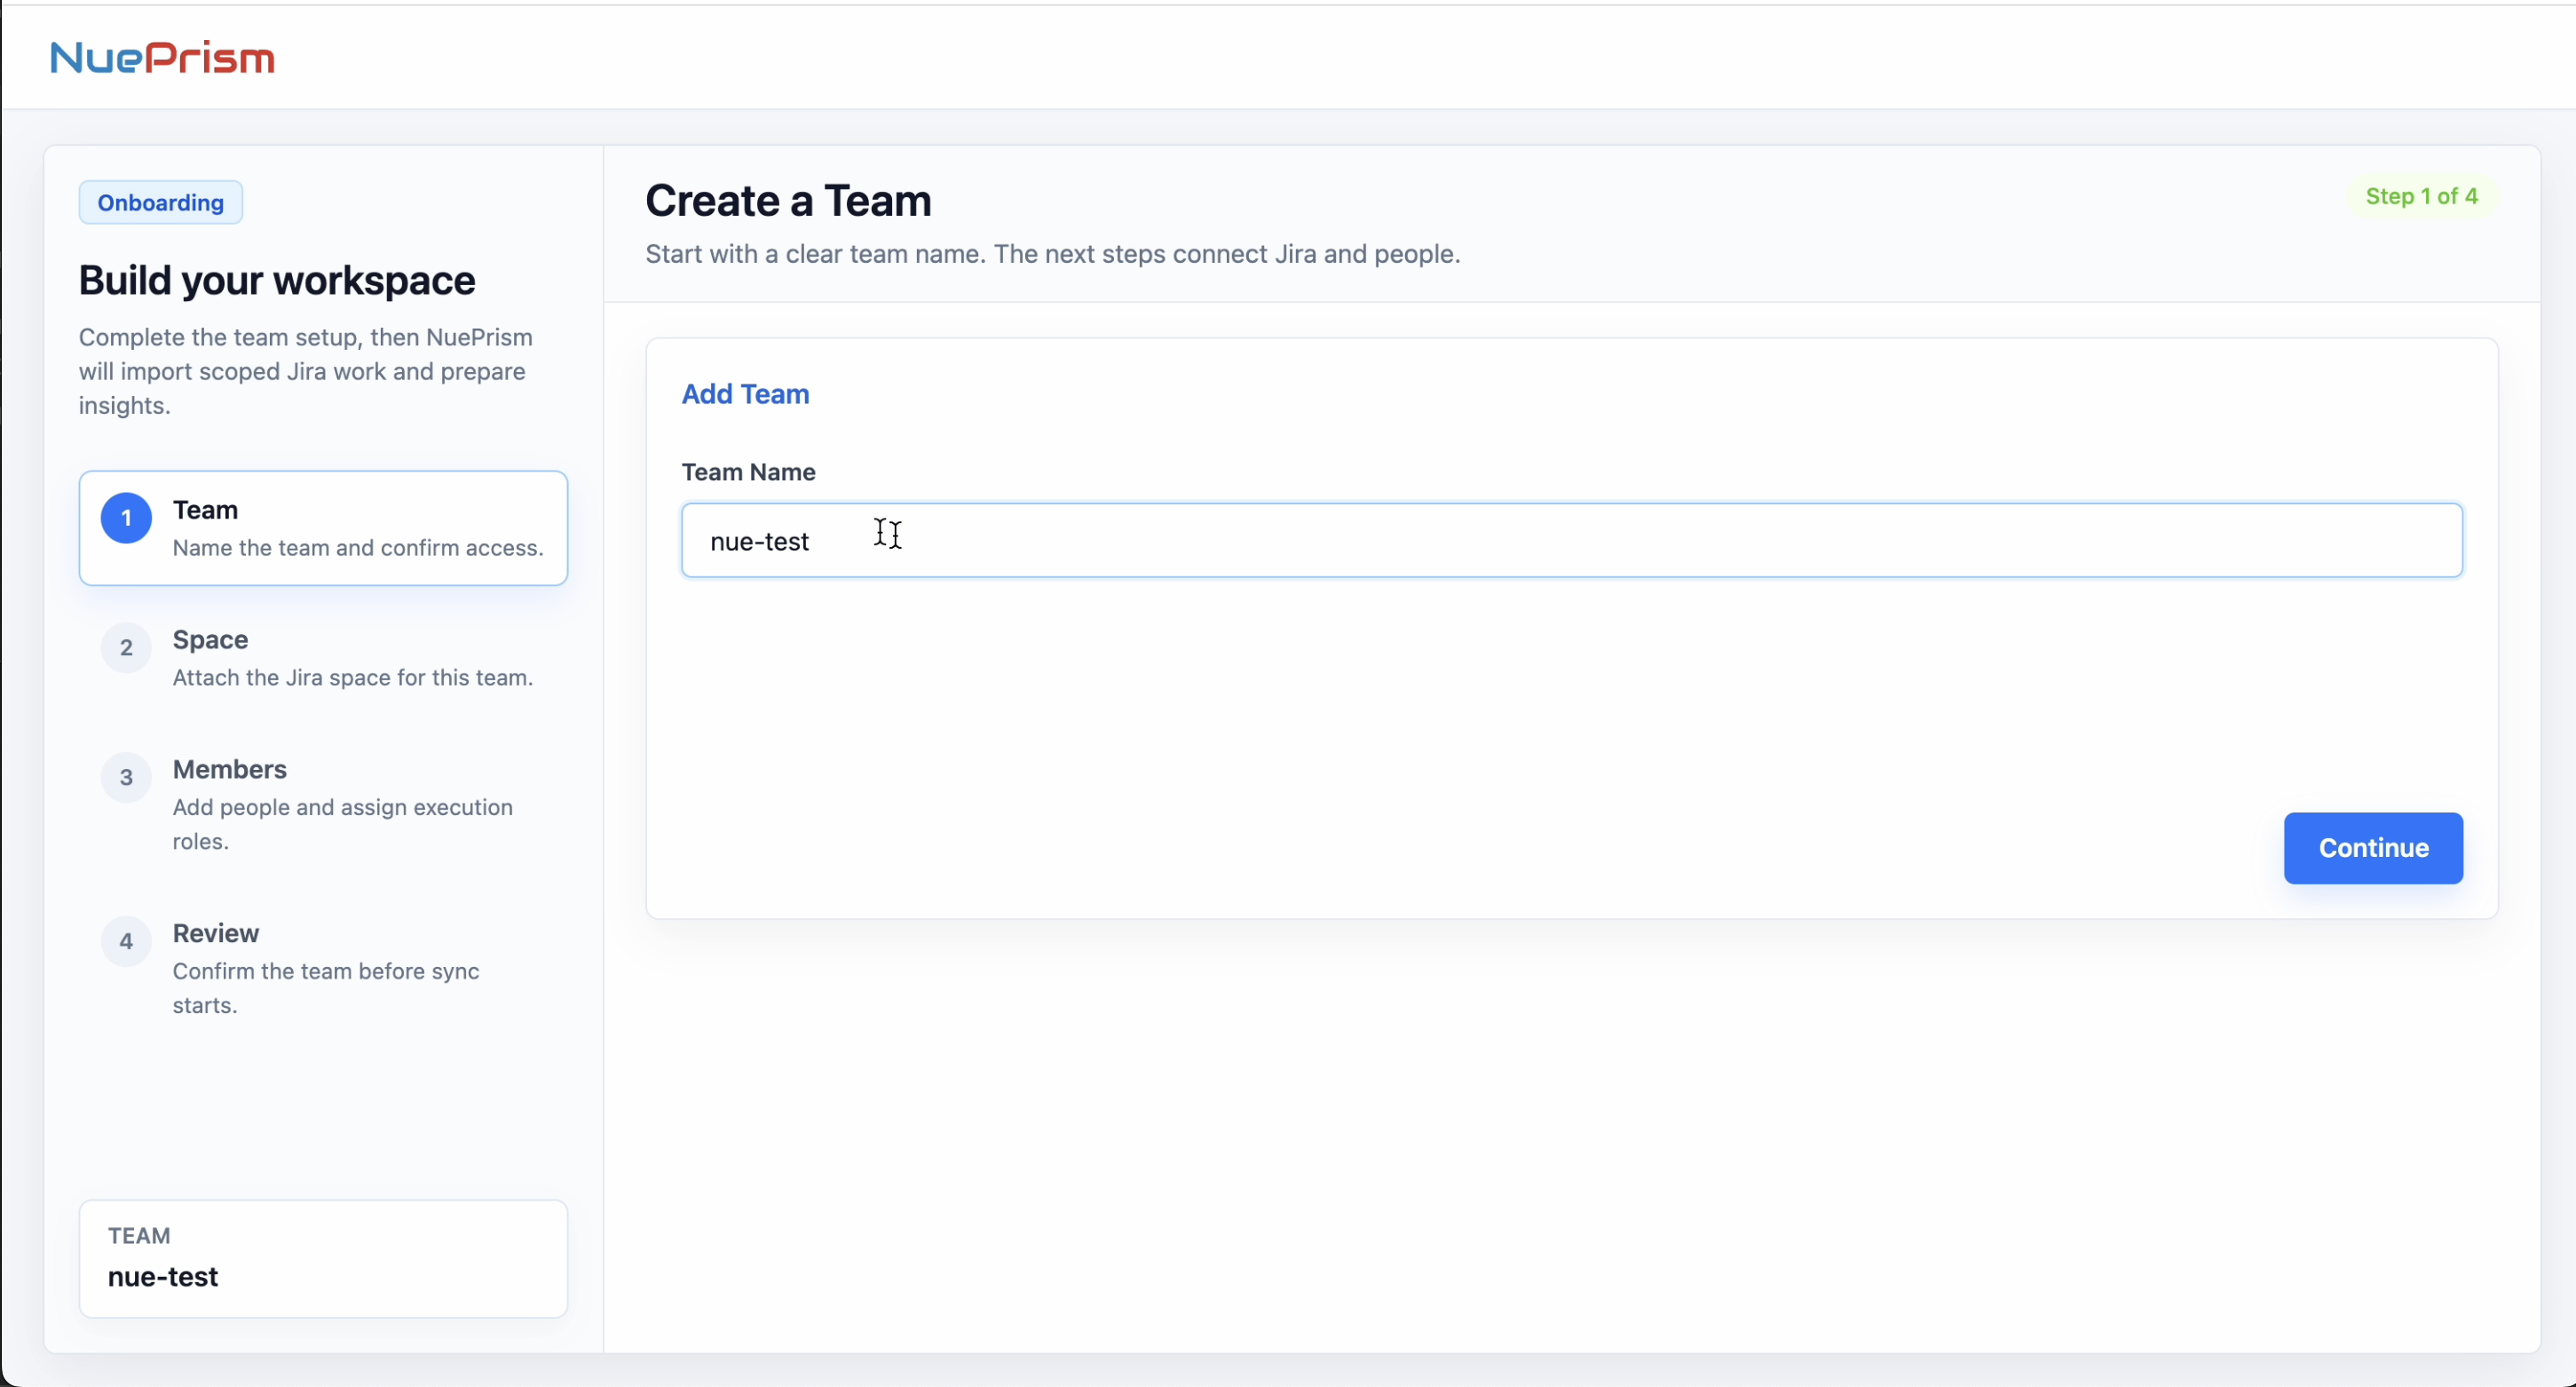
Step 2 — Attach a Jira Space
Select the Jira Space that contains this team's work.
1Open the Spaces dropdown.
2Choose the Jira Space containing the team's work.
3Select Continue.
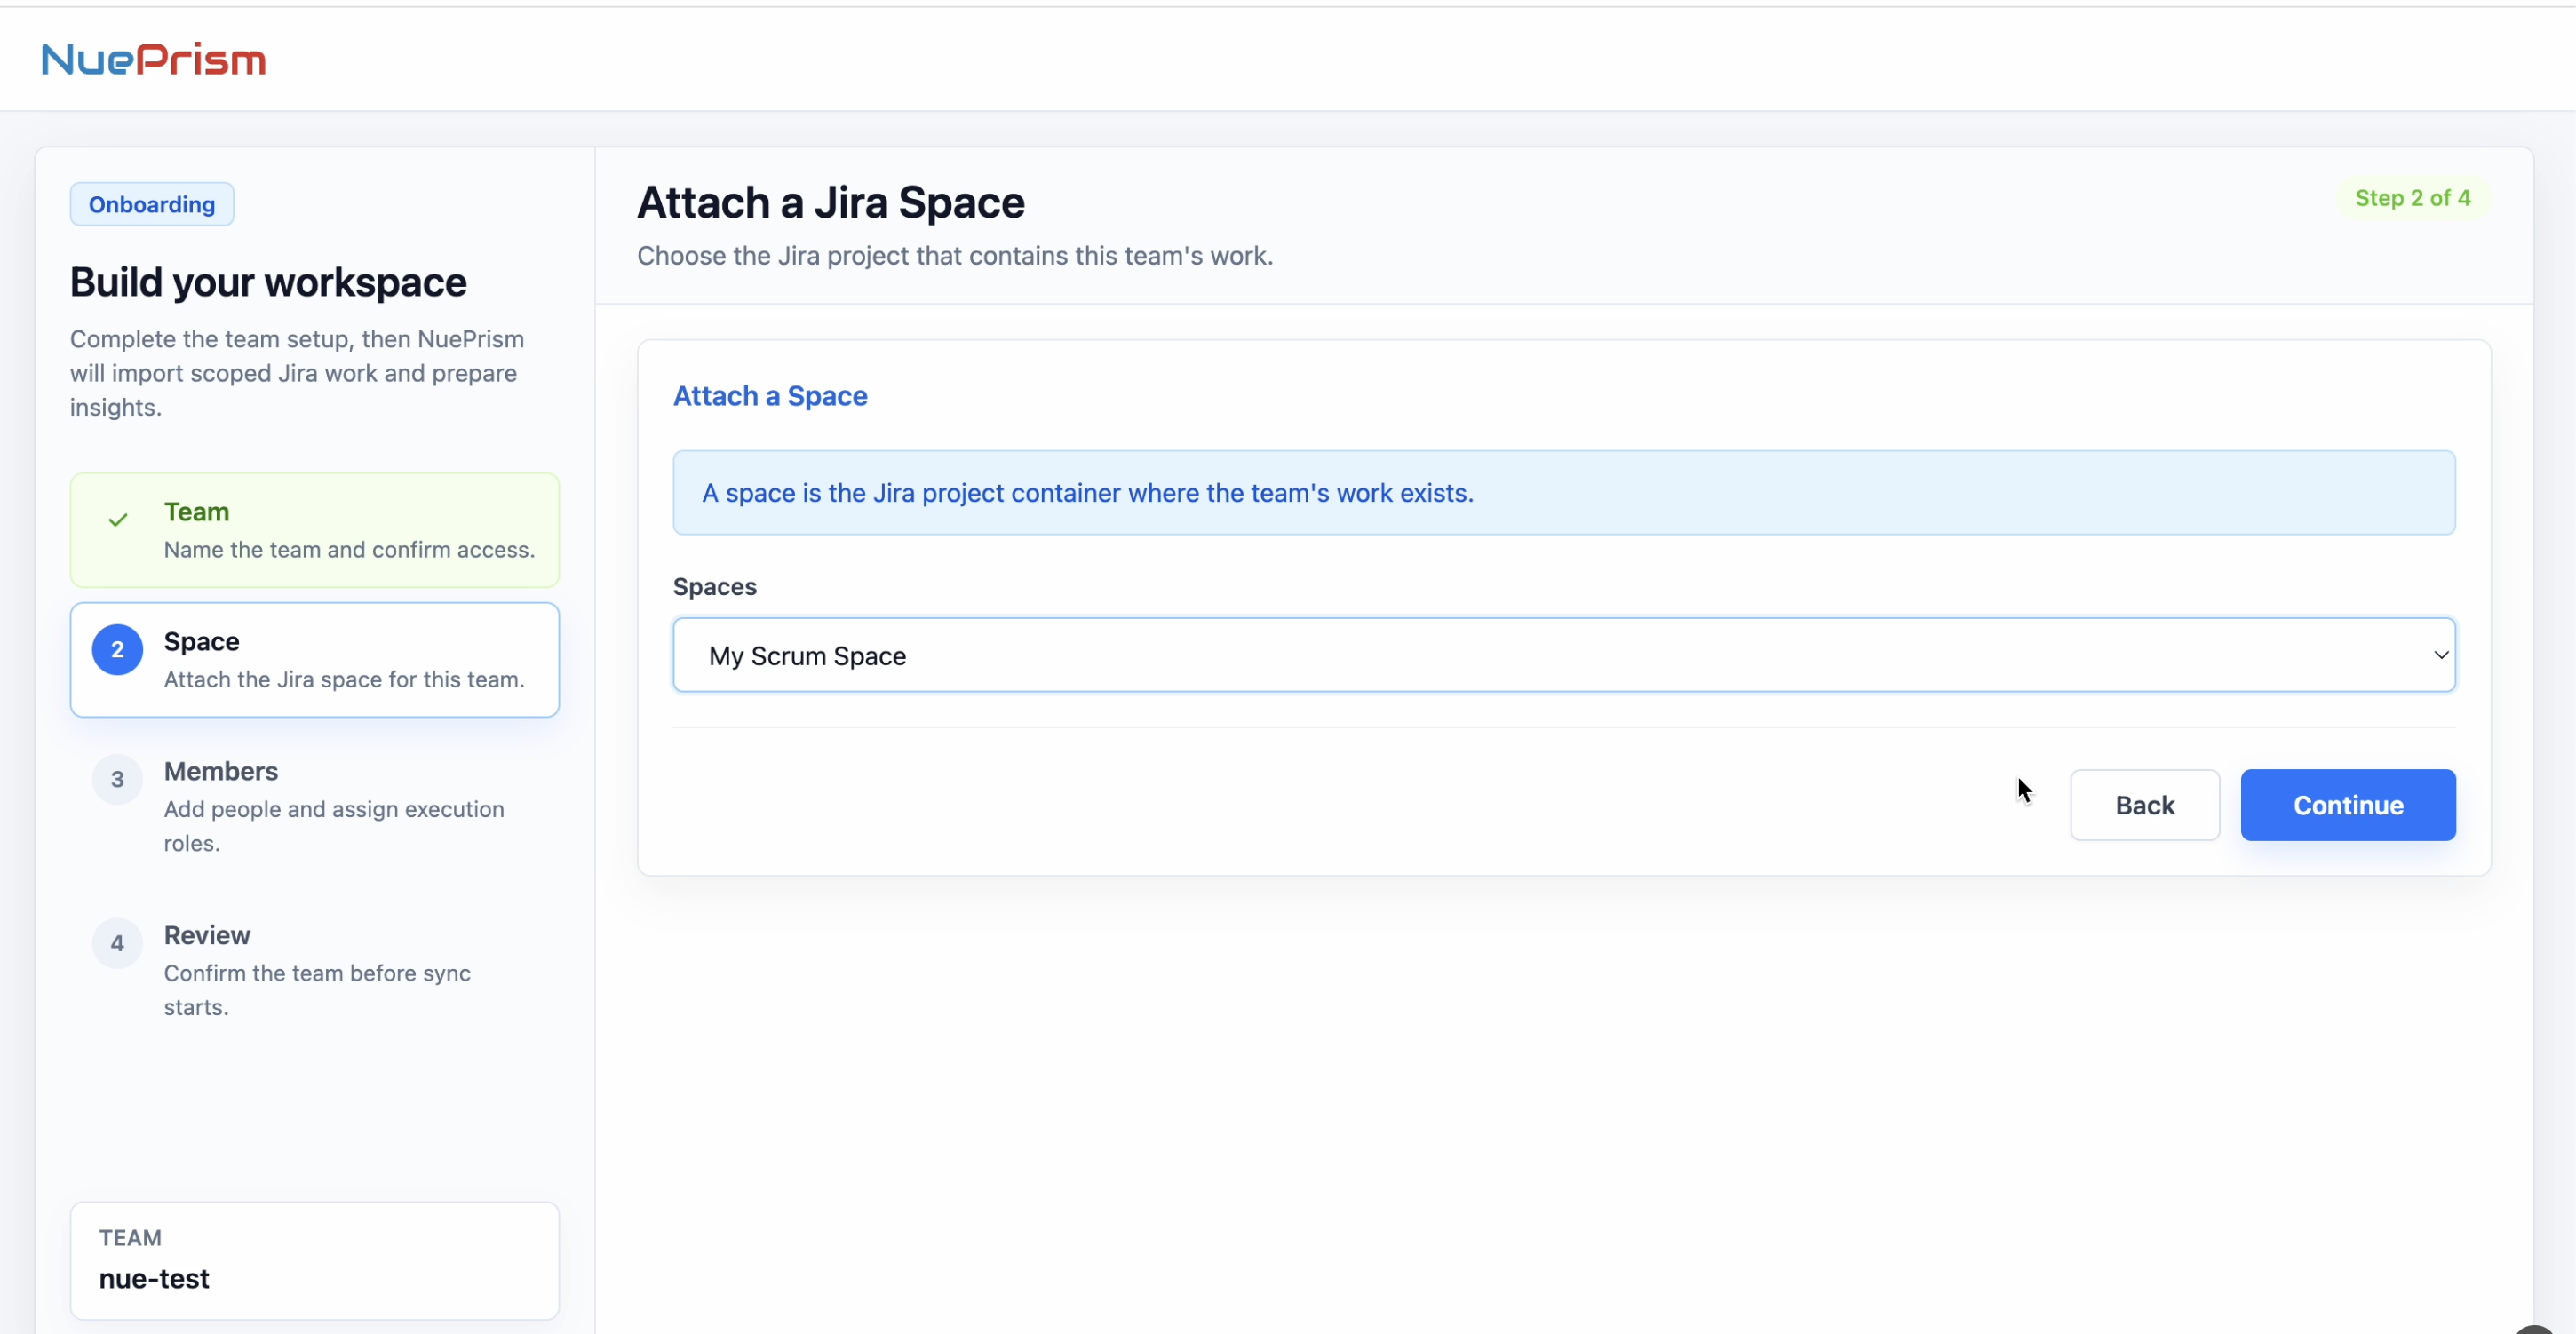
In this setup flow, Space refers to the Jira project container where the team's work exists.
Step 3 — Add Team Members
Add the people who belong to this team and assign the execution role or roles that apply to them.
1Choose one or more people from Choose member(s).
2Select Add members.
3For each selected member, choose at least one execution role.
4Select Continue.
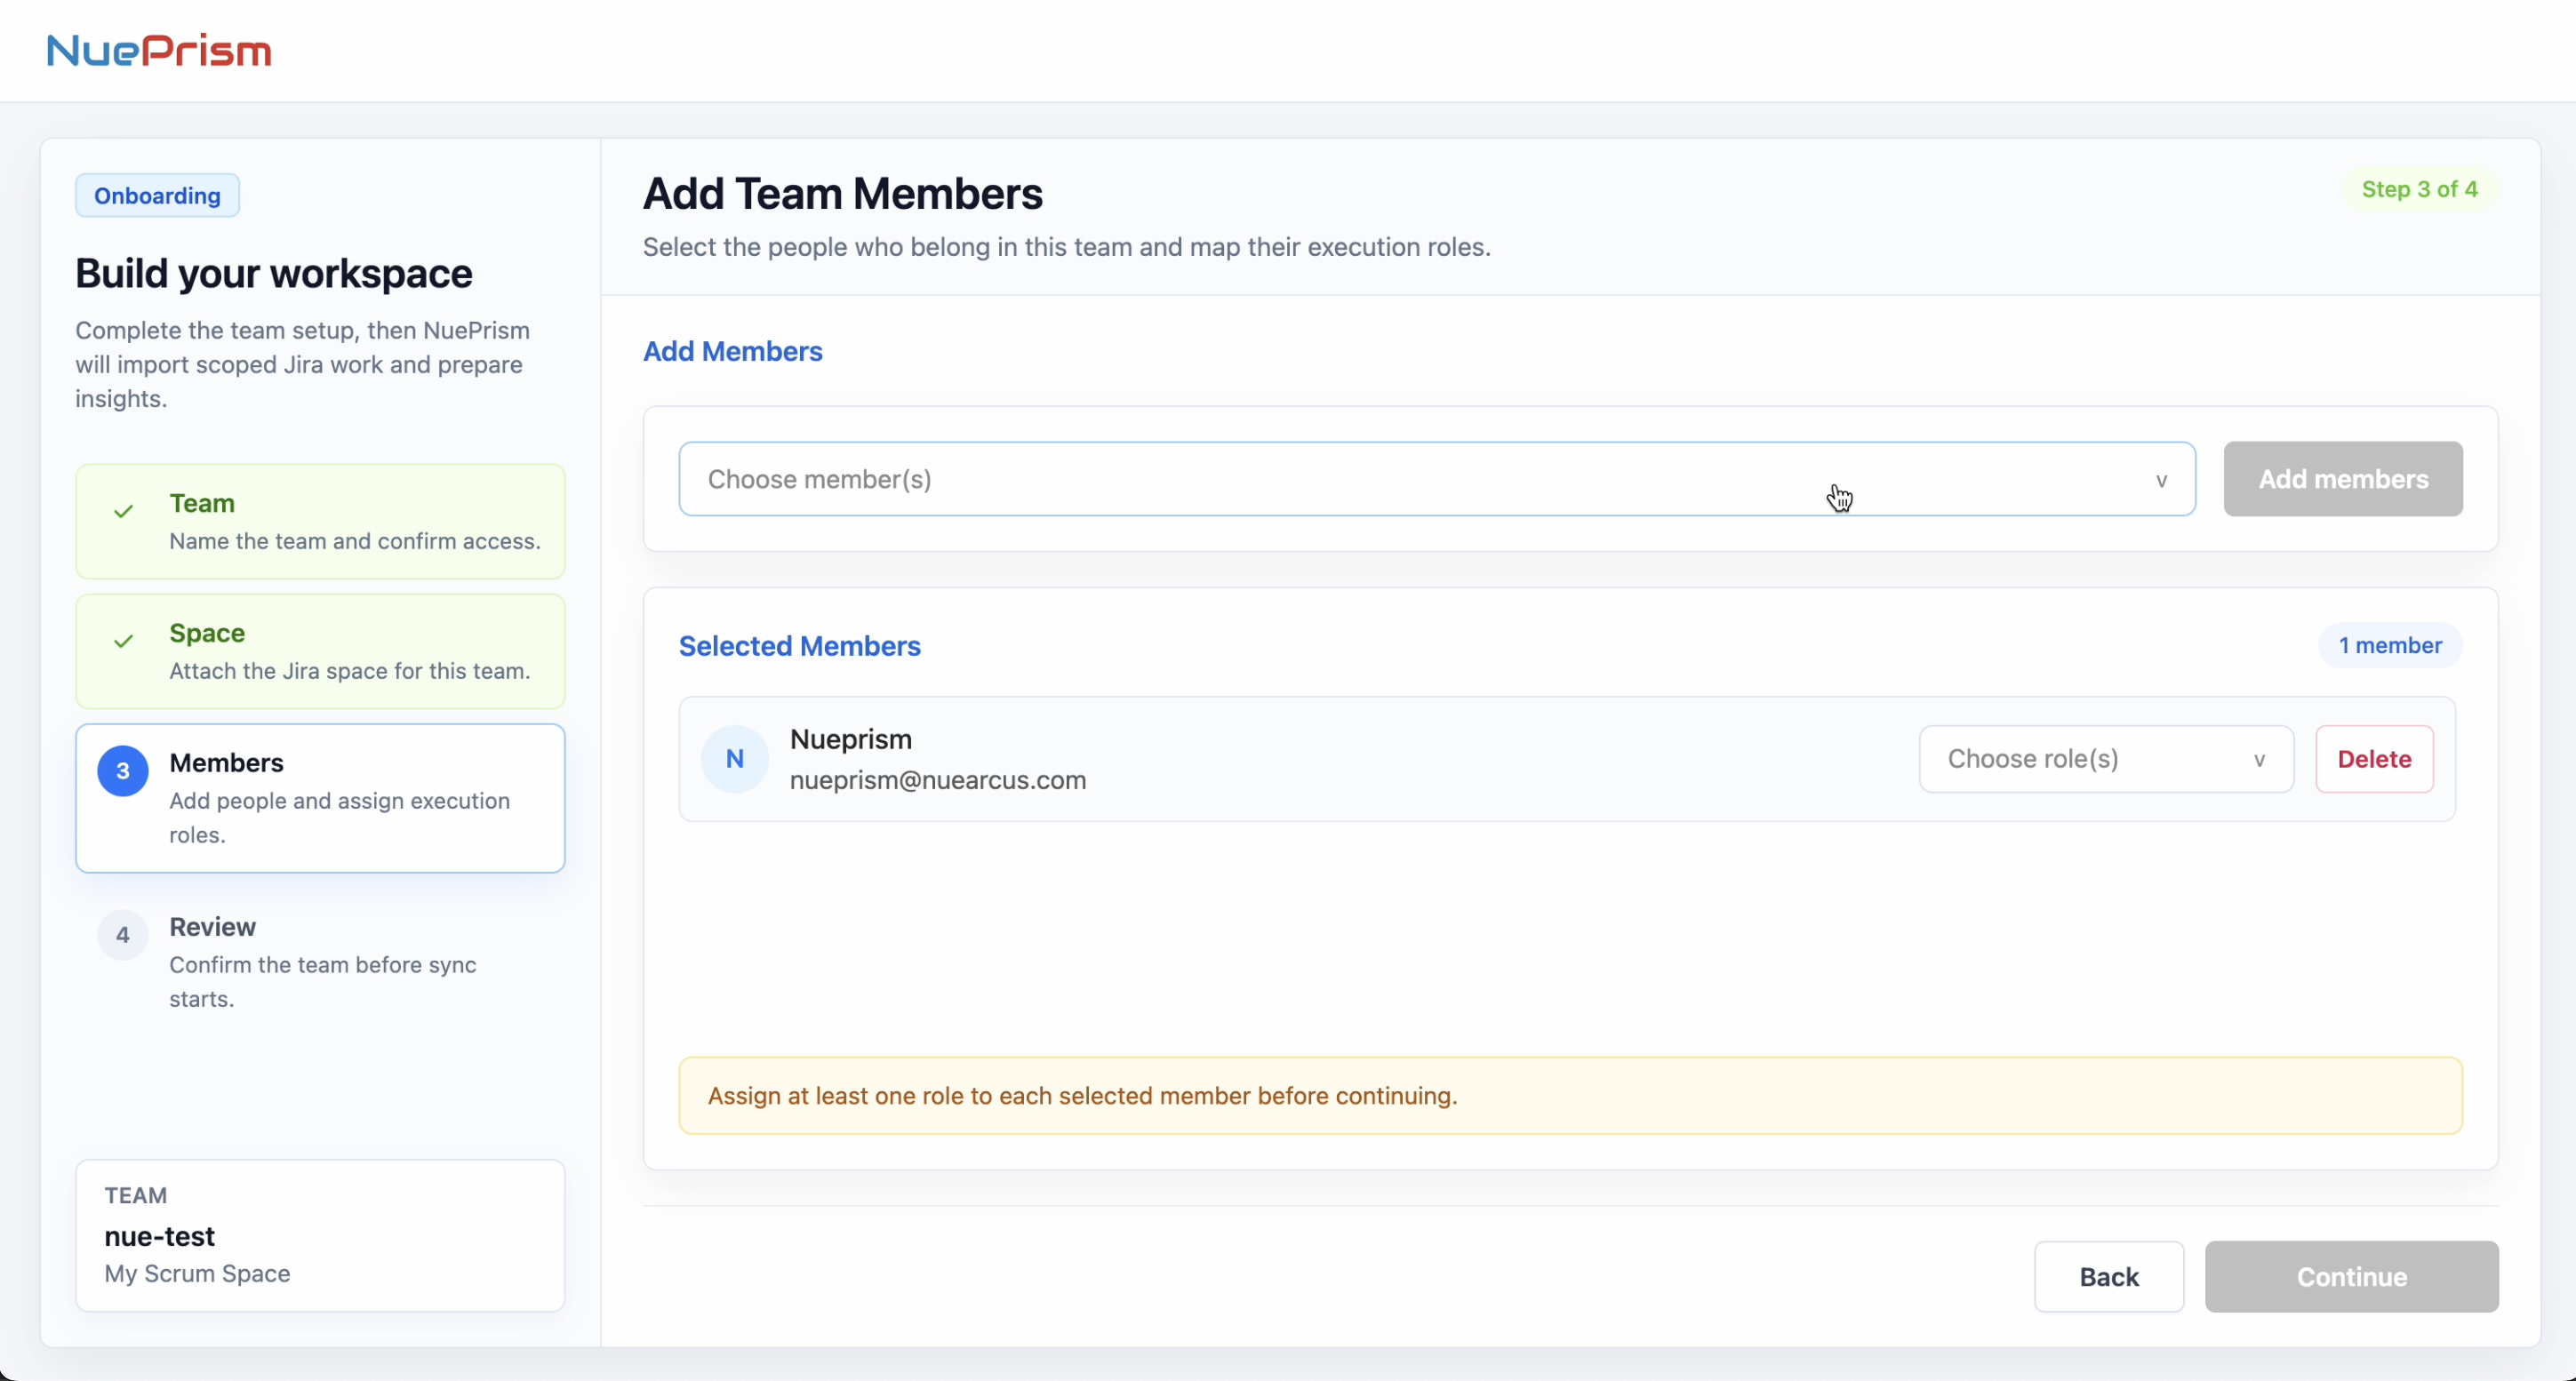
Required: each selected member must have at least one role before you continue.
Step 4 — Review and Start
After you confirm the setup, NuePrism saves the configuration and begins preparing the workspace.
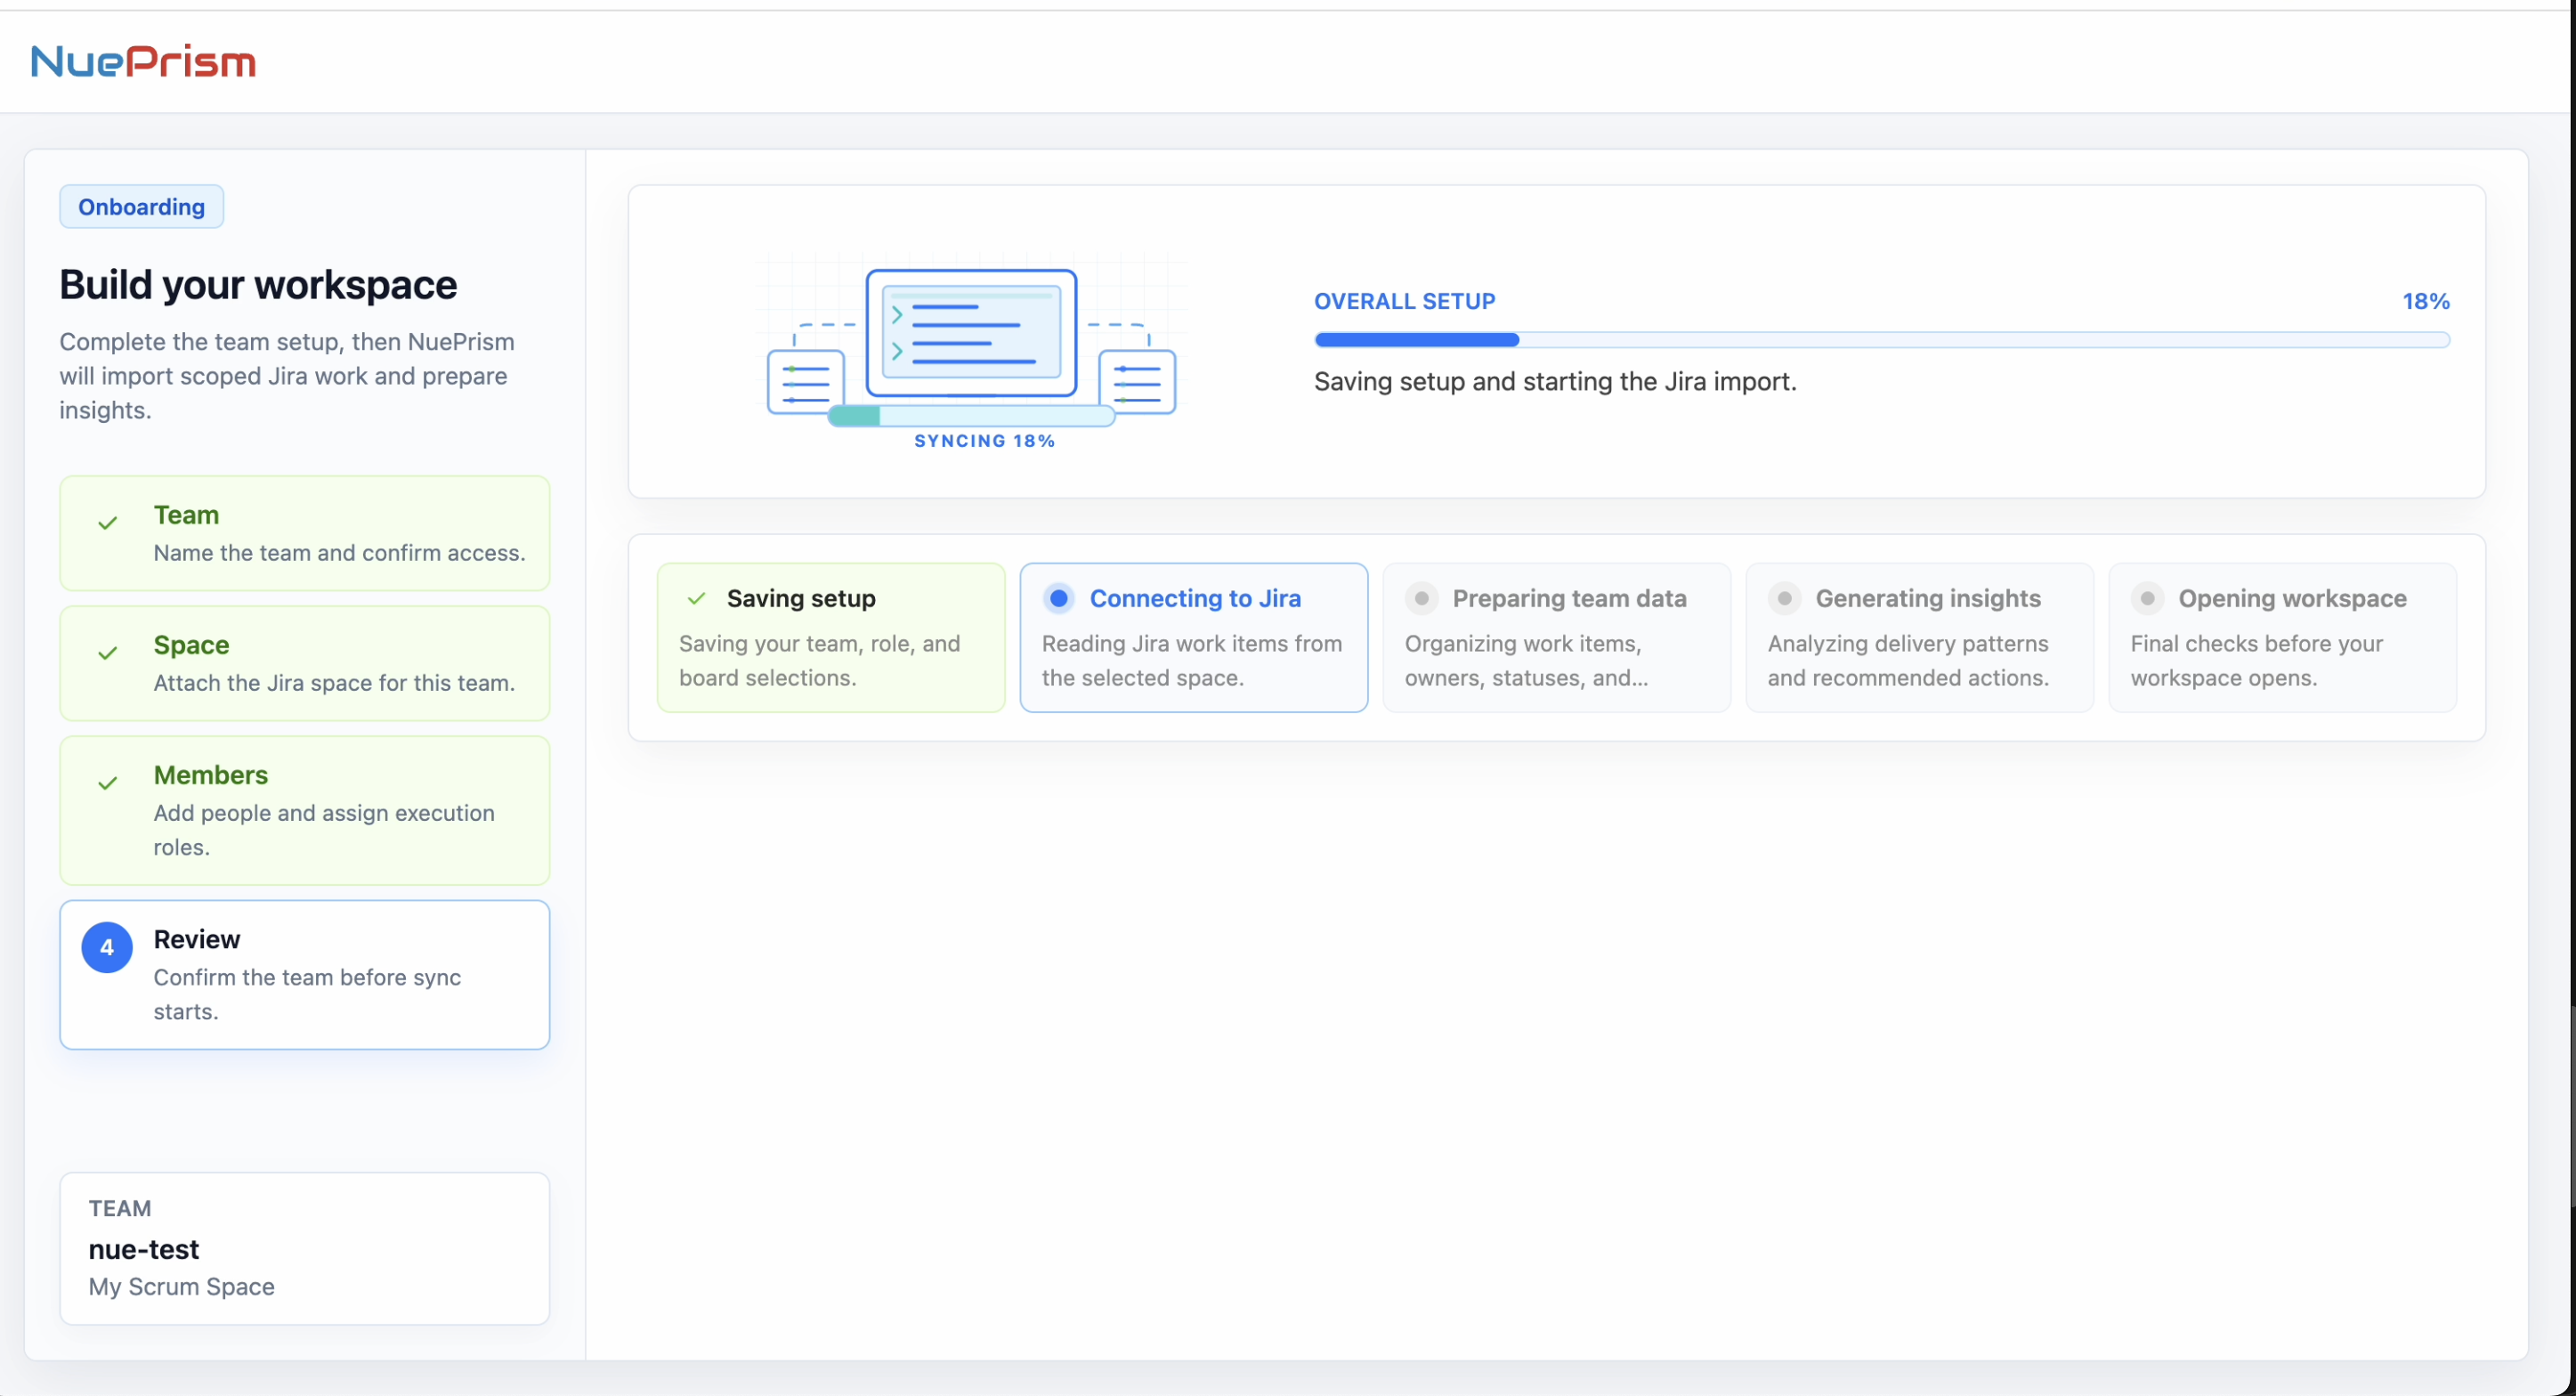
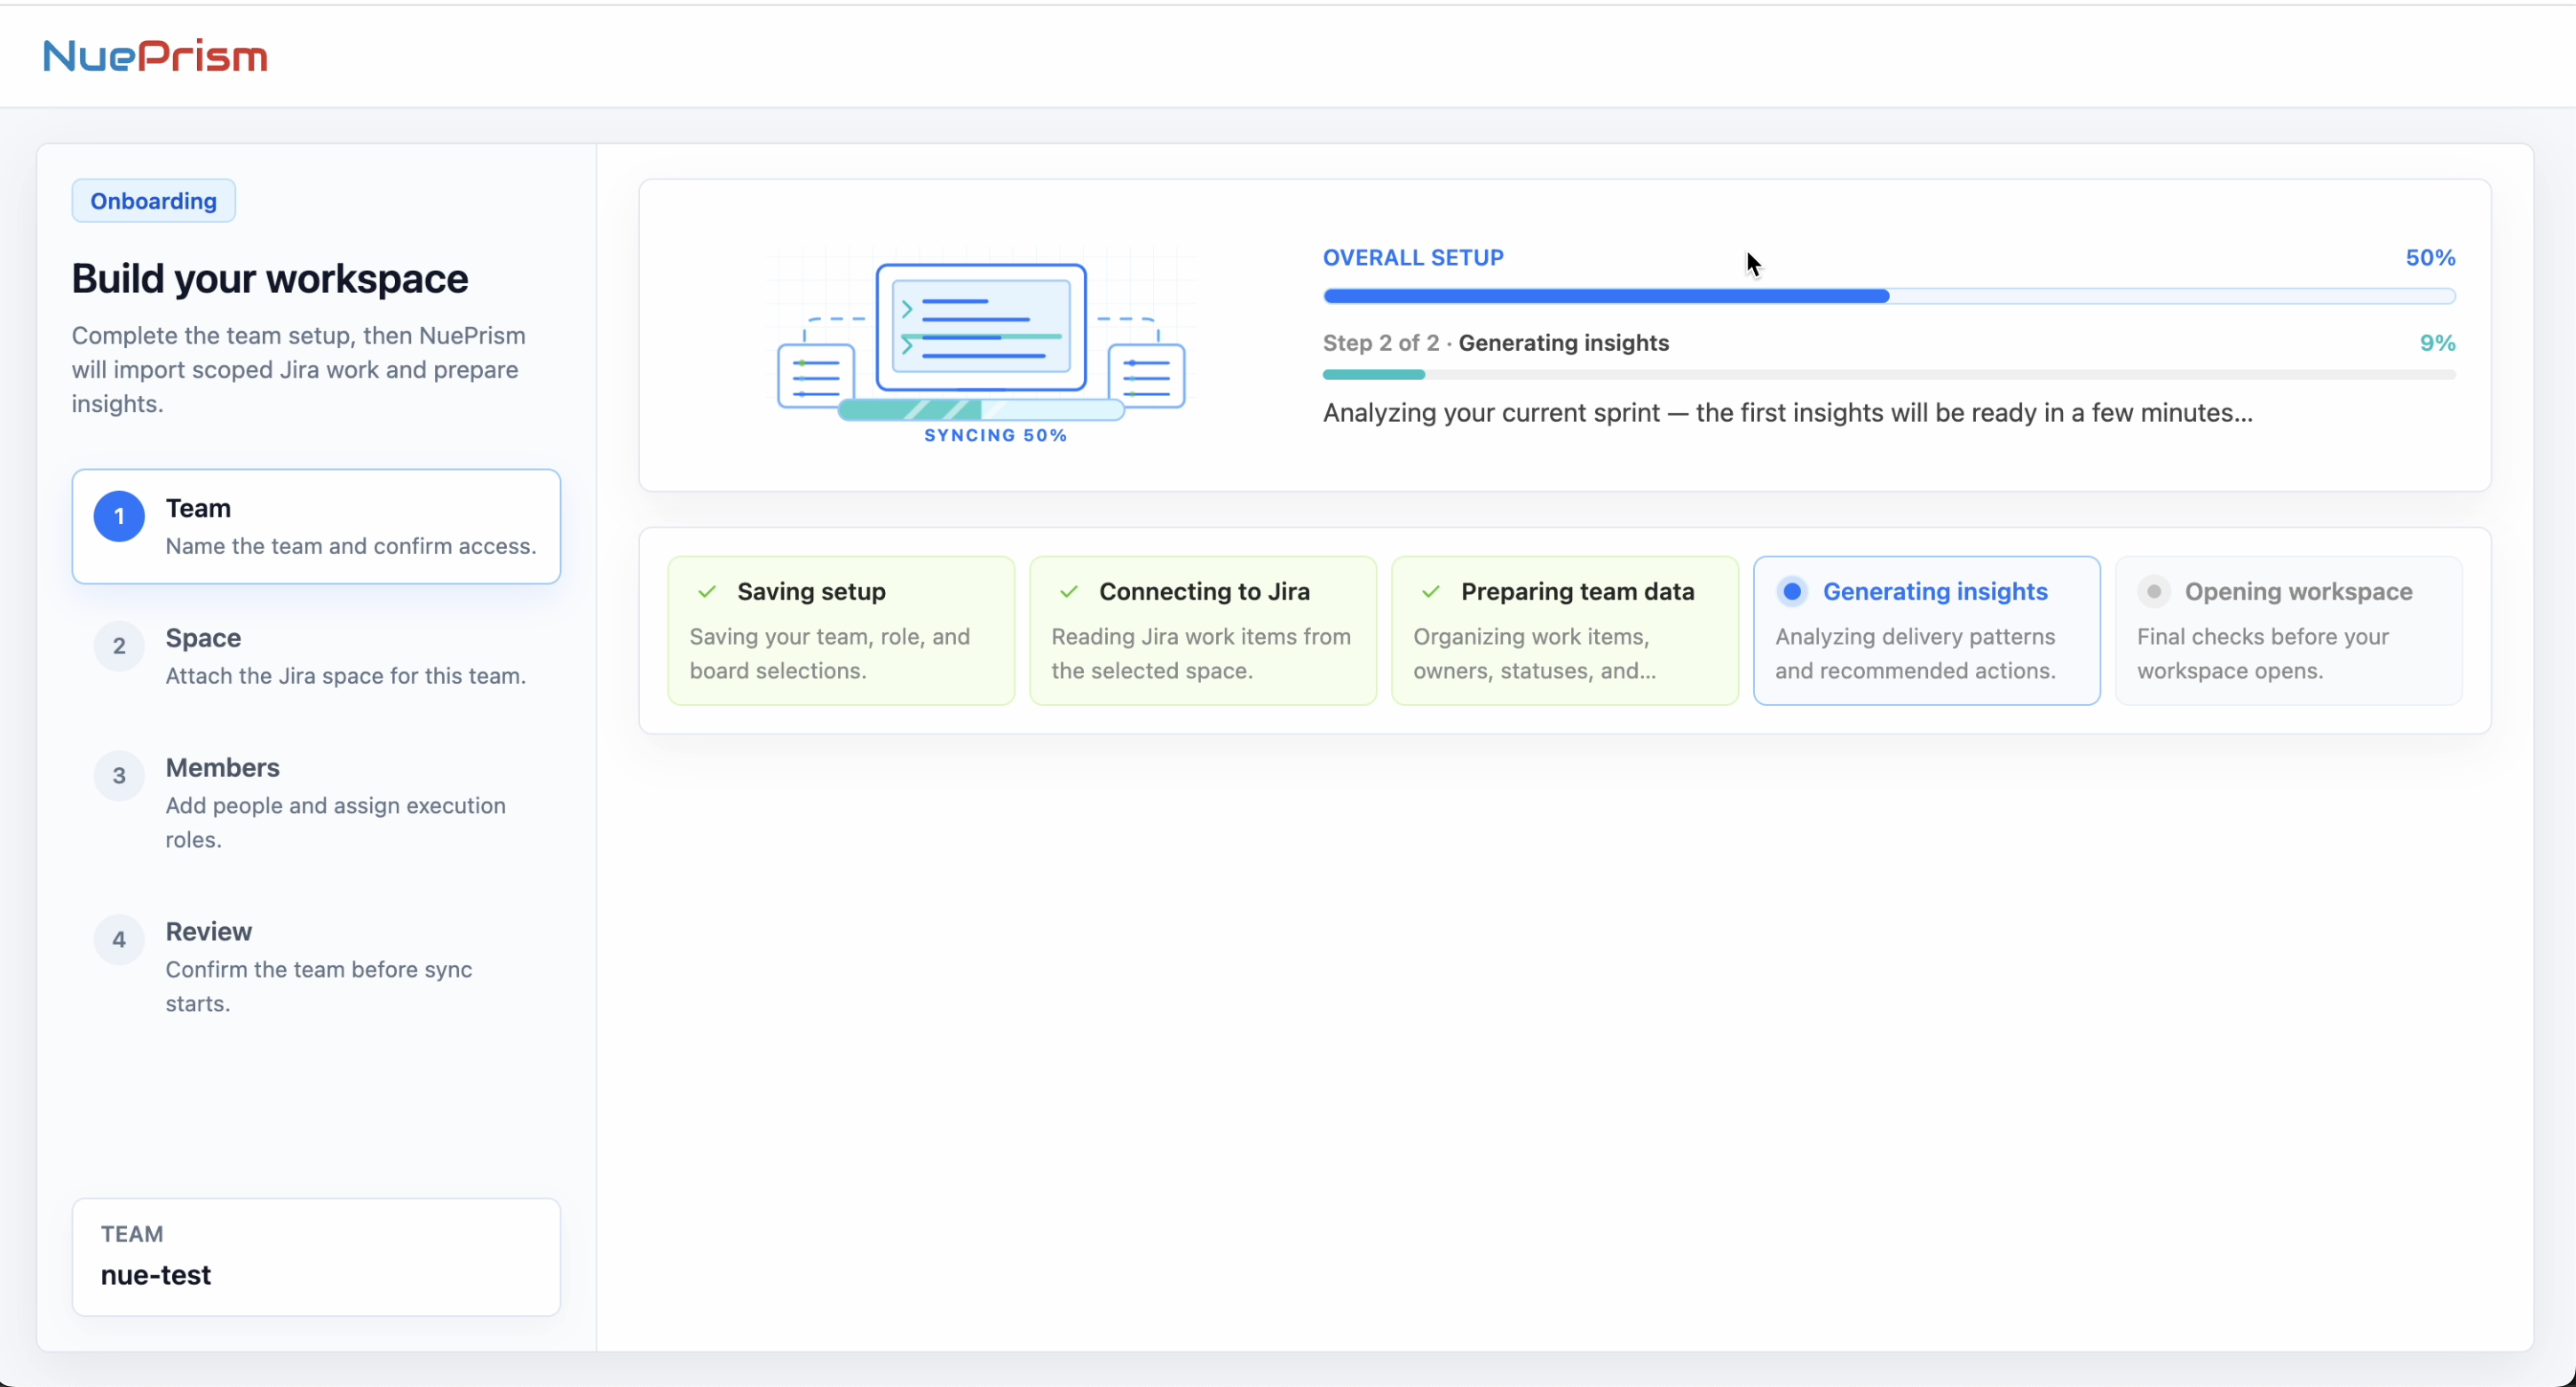
Workspace preparation stages
- Saving setup — saves the team, Jira Space and role configuration.
- Connecting to Jira — reads the scoped Jira work for the selected team context.
- Preparing team data — prepares imported work and execution context for analysis.
- Generating insights — analyses the current execution state and prepares initial insights.
- Opening workspace — completes final checks before the team workspace opens.
Generating insights
Once Jira data has been prepared, NuePrism begins the analysis stage. The onboarding screen shows both the overall setup progress and the current processing step.
If expected Jira work is missing, do not treat missing data as healthy execution evidence. Recheck the team scope and attached Jira Space before relying on the resulting diagnosis.
Setup complete?
Learn how to read the first execution verdict and where to inspect the supporting analysis.
Last updated: September 2026